Doner is a plugin made mainly for mappers to make their job a bit easier. Today it is supported by three GIS applications: ArcGIS, QGIS and Mapinfo. The main task of it is to mark a place on map where digitizing/geometry check/attribute check processes are completed so that user will see that he has not to return to particular place on map.
There are three main buttons in plugin (MapInfo version has four, further explained):
 Add doner – adds an ellipse on current map extent
 Cut doner – cuts an ellipse from existing Doner layer if there are any geometry in it
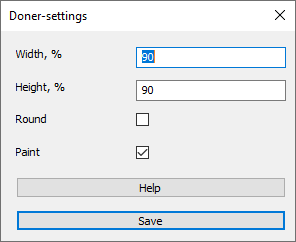
 Settings – settings window where user can set width/height of ellipse, turn on/off only round shape and paint by default transparent orange color
 Set CRS (only in MapInfo) – sets current view’s coordinate system in order for plugin to get right coordinates
Links to download plugins:
All data produced by this plugin will be stored in C:\Users\%username%\Documents\mapDoner. After using plugin another folders will appear in this path with a reference to GIS application you used. There are two kind of files there: a configuration file and Doner layer (*.shp for ArcGIS and *.tab for MapInfo). You do not have to create any folder or file, plugin does it itself.
Video reference:
ArcGIS
(Tested on ver. 10.2, 10.8)
Installation:
Close ArcMap/ArcCatalog and double-click on file Doner.esriaddin in file explorer. (That is because a development version cannot match user’s version of ArcGIS)
Open ArcMap. If there are no three plugin buttons, go to Customize – Customize Mode… and check for Doner toolbar
Load any layer or project with layers in ArcMap
Now you can try to press Add doner button and a new layer called Doner will appear. It will contain an orange ellipse already
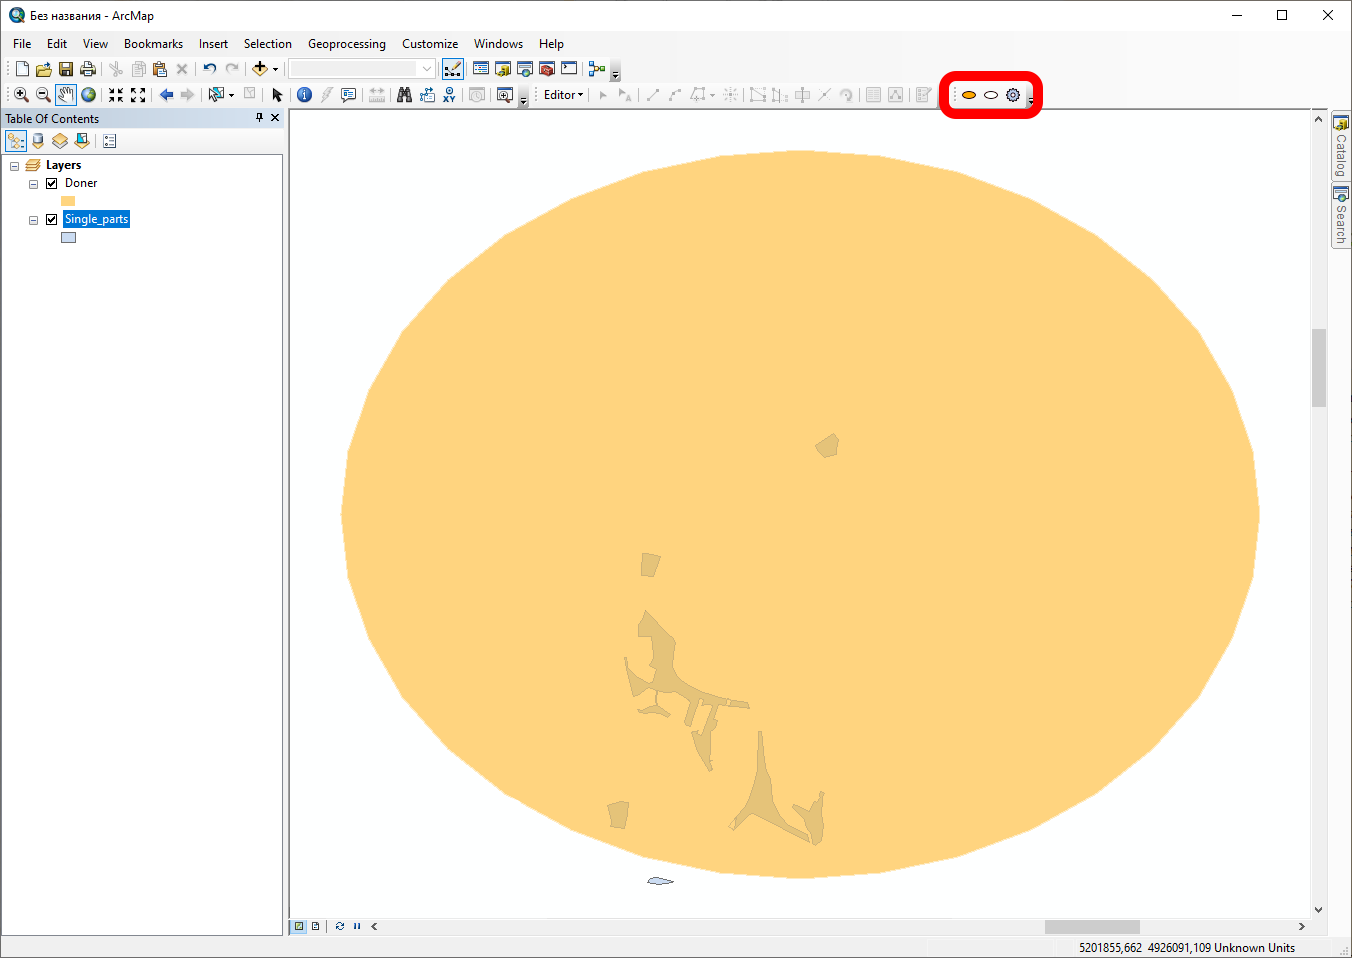
By pressing Add doner multiple times, you will see that new ellipses will appear and immediately join the initial Doner shape.
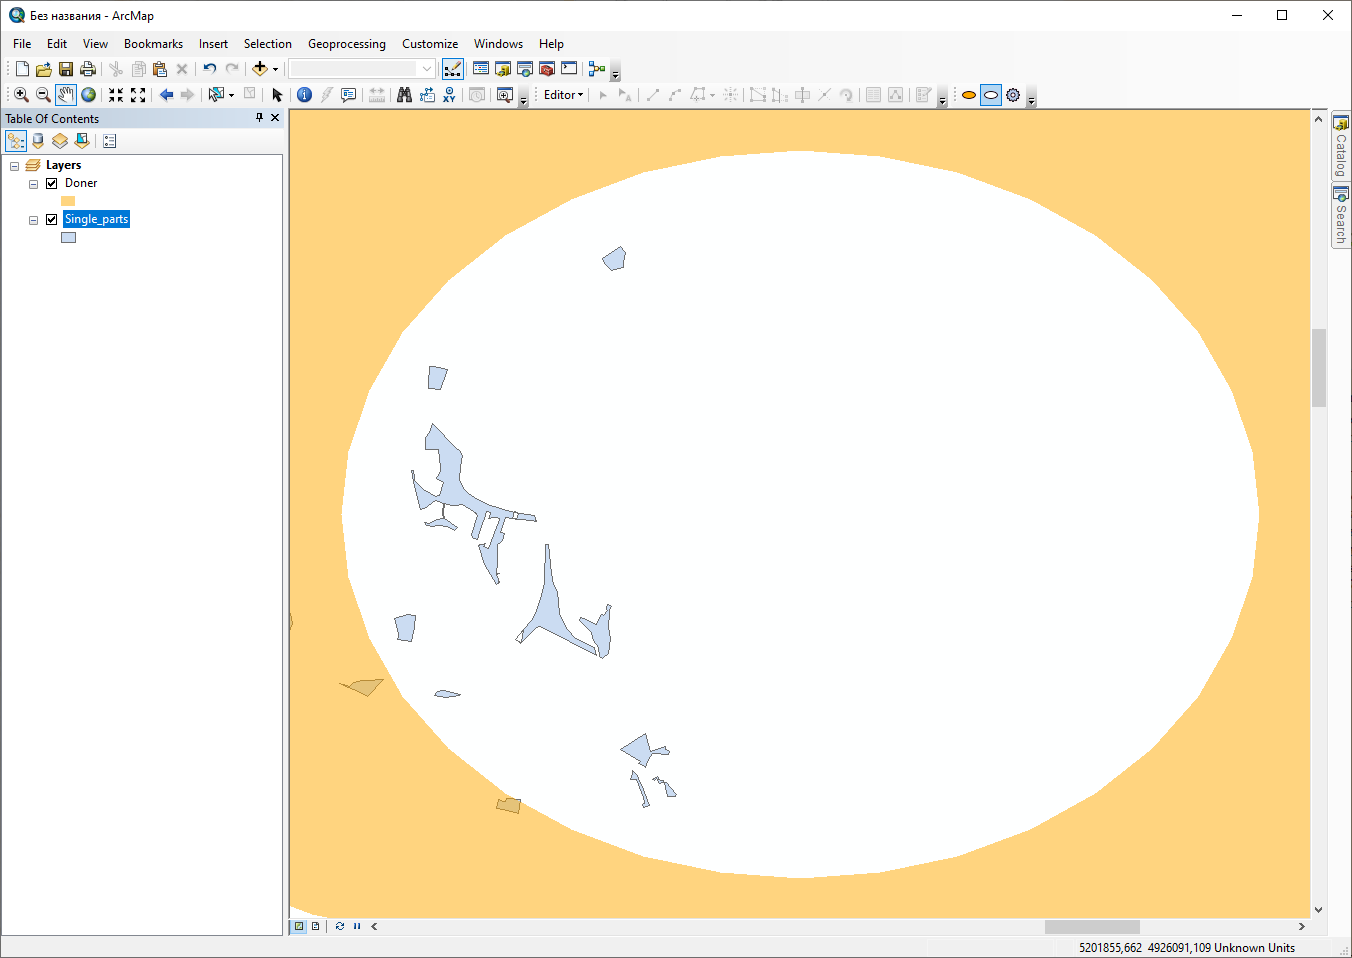
Cut doner will cut an ellipse shape in initial Doner layer if there is an intersection with it. You may cut everything and layer will be empty. After that, you still can add new ellipses.
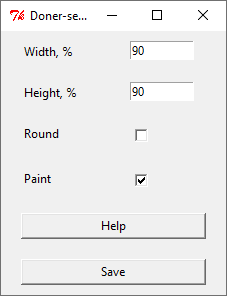
Doner settings provide manual set for width and height of ellipse in percent of current extent’s width/height. It cannot be string, zero, decimal or negative number, just a simple integer number from 1 to 100. You also can set a number more than 100 but as a result, ellipse will cross bounds of current extent. In addition, you can change a "Round" checkbox to make a round shape according only on height value. "Paint" checkbox will automatically set a symbology to Doner layer (borderless translucent orange fill).
After closing ArcGIS, Doner shapefile layer will be located in C:\Users\%username%\Documents\mapDoner\arcgis_doner. When you start ArcGIS again and press "Add doner", plugin will use this layer
QGIS
(Tested on ver. 3.x.x)
Installation:
In QGIS main window go to Plugins – Manage and Install Plugins – Install from ZIP and browse for doner.zip
If there are no three plugin buttons, go to Plugins – Manage and Install Plugins, select Installed tab and find Doner. Check the state of checkbox in front of it
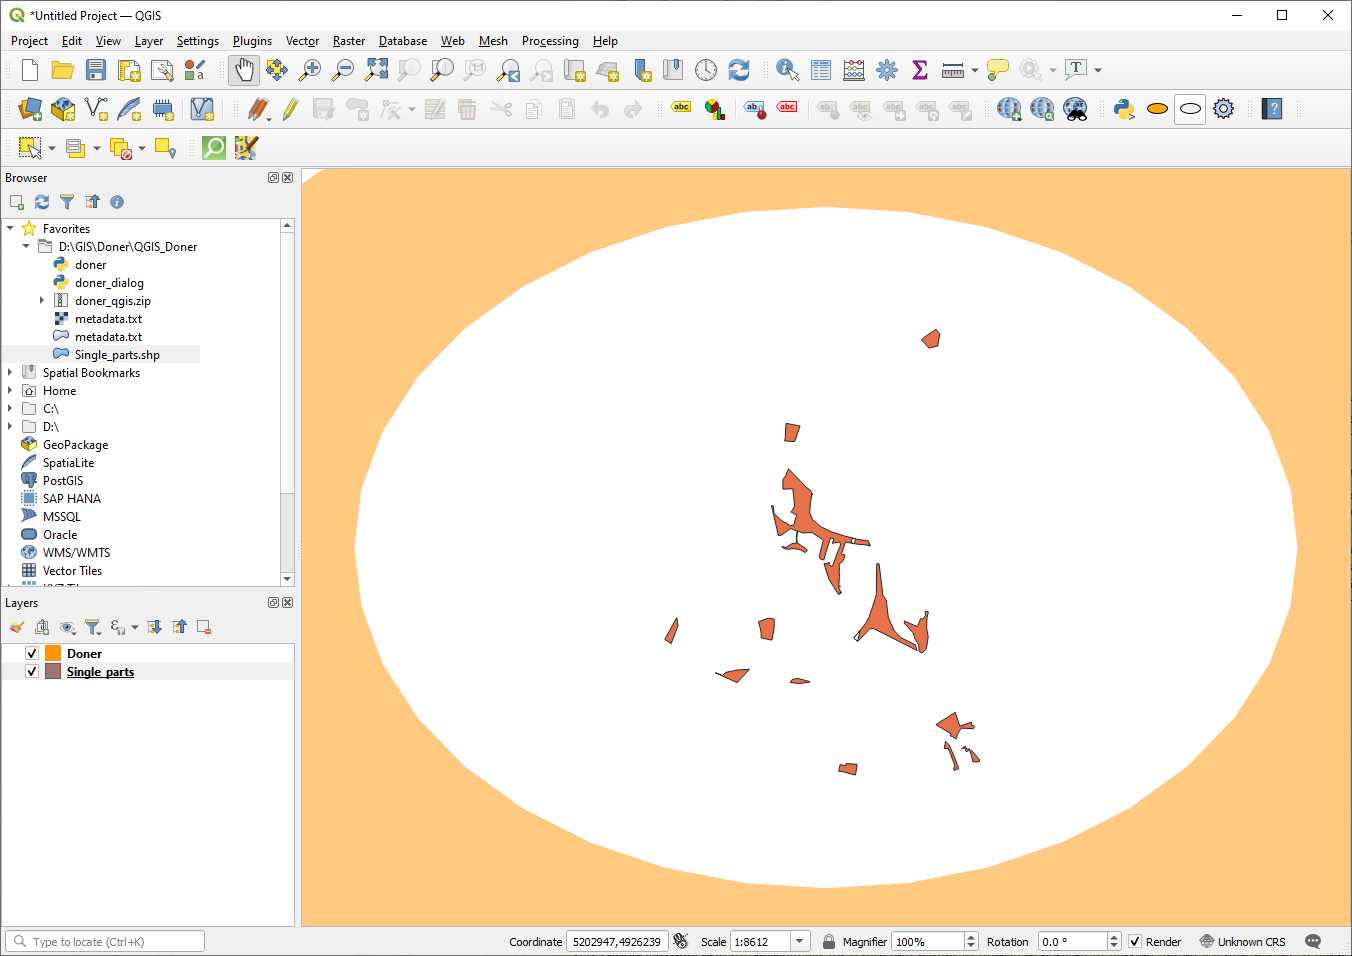
Load any layer or project with layers in QGIS
Now you can try to press Add doner button and a new layer called Doner will appear. It will contain an orange ellipse already
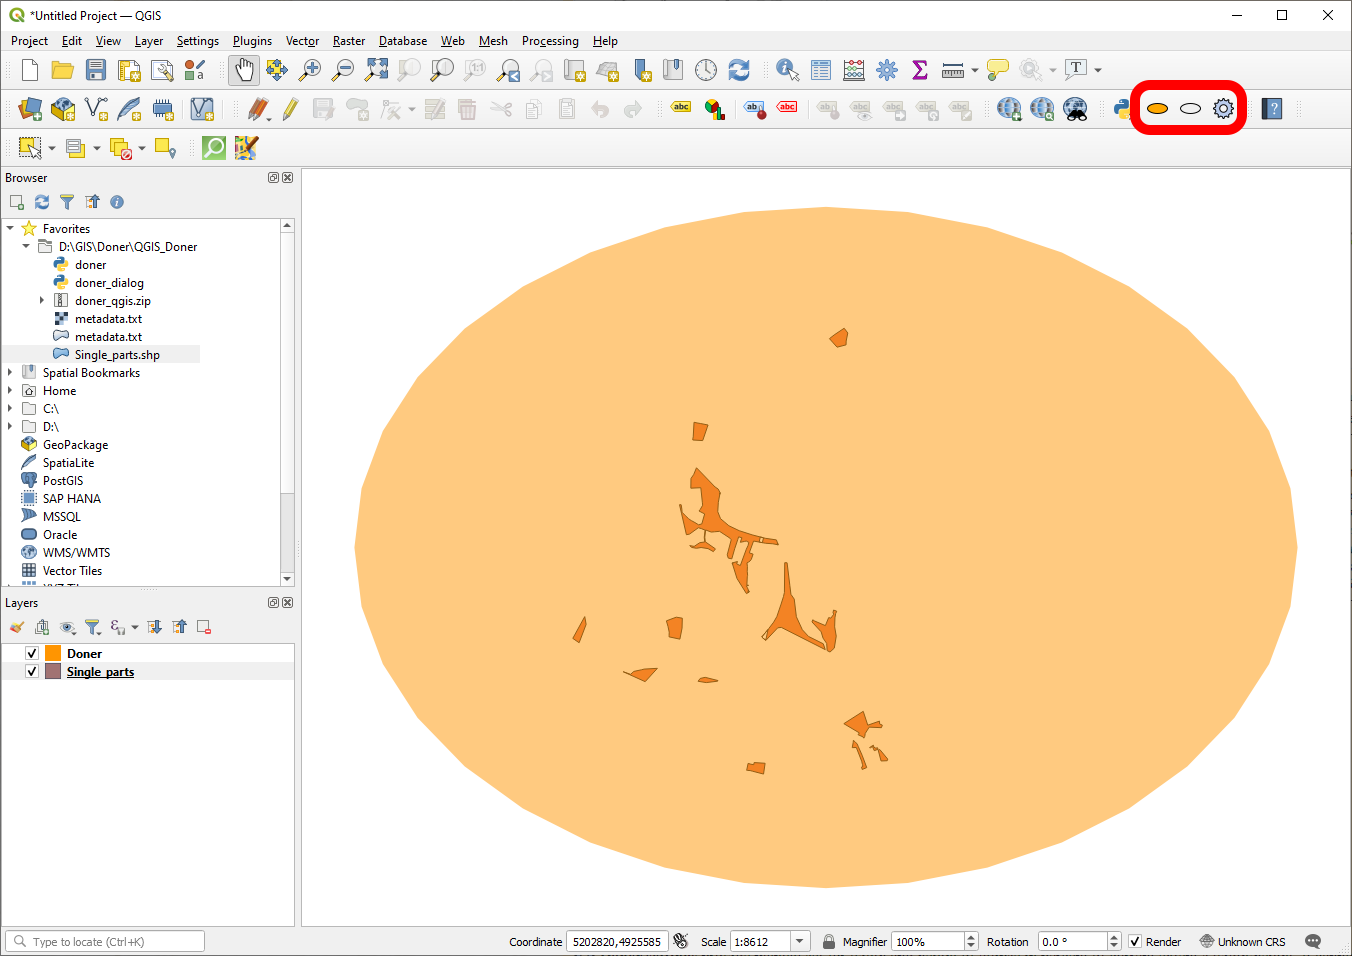
By pressing Add doner multiple times, you will see that new ellipses will appear and immediately join the initial Doner shape.
Cut doner will cut an ellipse shape in initial Doner layer if there is an intersection with it. You may cut everything and layer will be empty. After that, you still can add new ellipses.
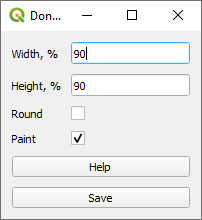
Doner settings provide manual set for width and height of ellipse in percent of current extent’s width/height. It cannot be string, zero, decimal or negative number, just a simple integer number from 1 to 100. You also can set a number more than 100 but as a result, ellipse will cross bounds of current extent. In addition, you can change a "Round" checkbox to make a round shape according only on height value. "Paint" checkbox will automatically set a symbology to Doner layer (borderless translucent orange fill).
After closing QGIS, Doner shapefile layer will be located in C:\Users\%username%\Documents\mapDoner\qgis_doner. When you start QGIS again and press "Add doner", plugin will use this layer.
MapInfo
(Tested on ver. Pro 15.0 64-bit, Pro 16.0 64-bit)
Installation:
In MapInfo main window open Home – Tools – Options - Register Tool / Run Program and browse for doner.mbx. Note that if you want icons to be displayer, a DonerData.dll should be in the same folder as doner.mbx
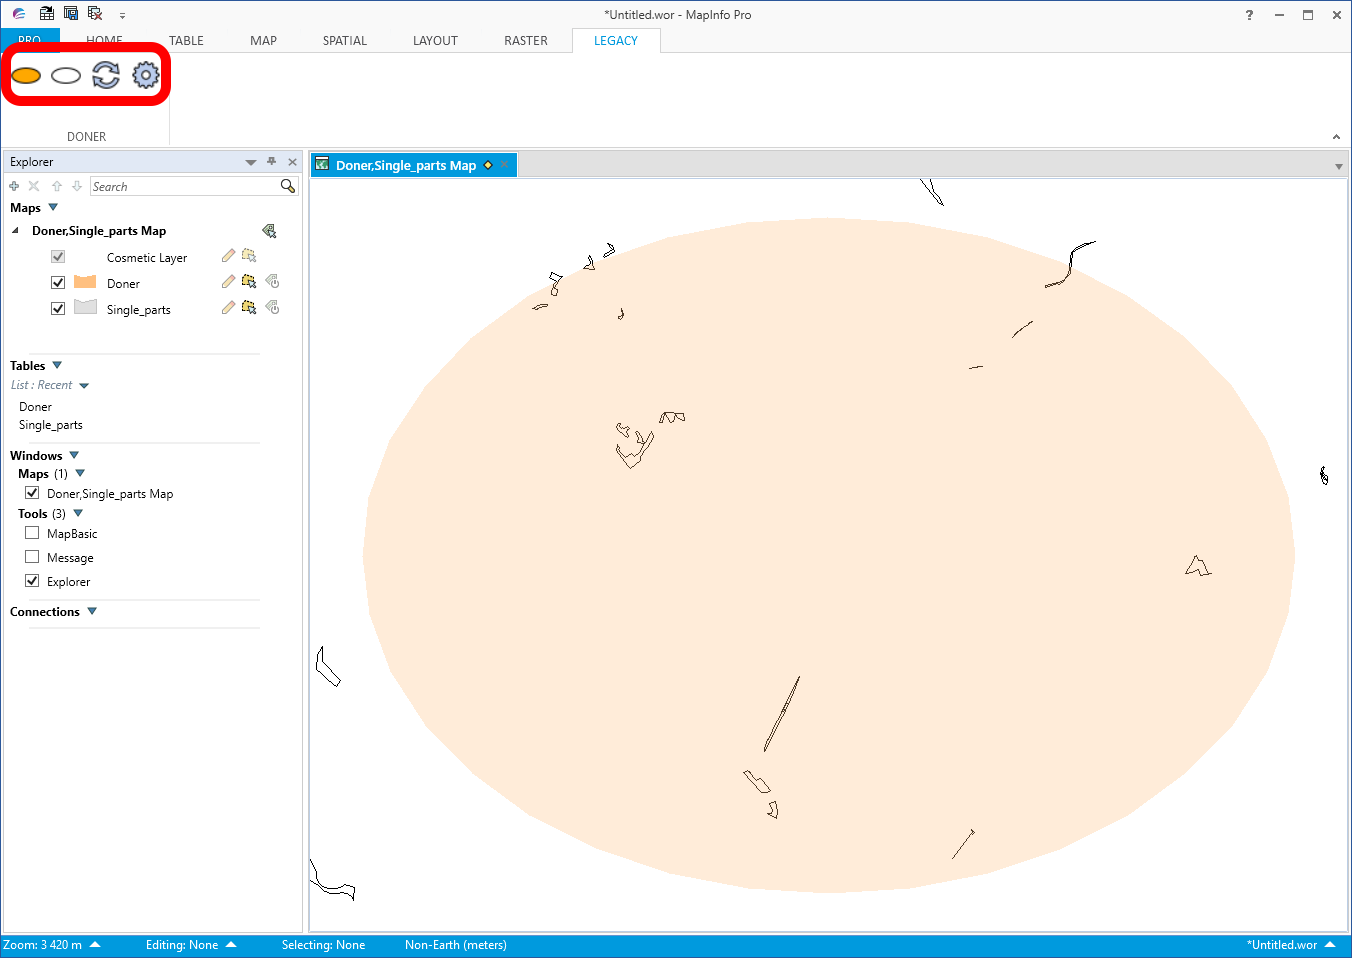
If there is no Legacy tab with four buttons, check Tool manager and find Doner in a list of registered plugins. Click on Load Tool icon
Load any layer or project with layers in MapInfo
Now you can try to press Add doner button and a new layer called Doner will appear. It will contain an orange ellipse already
By pressing Add doner multiple times, you will see that new ellipses will appear and immediately join the initial Doner shape.
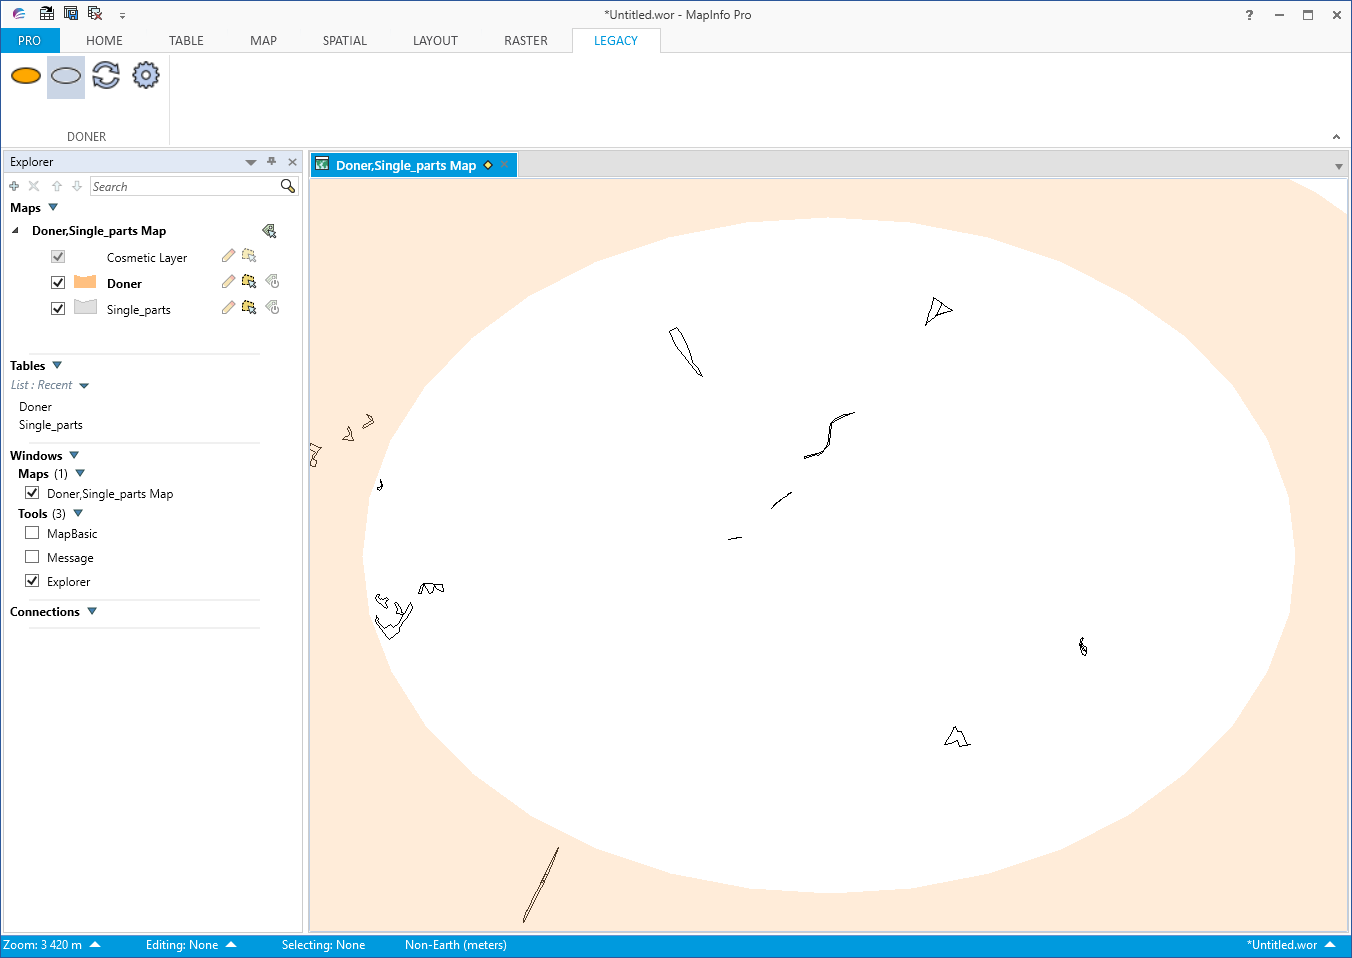
Cut doner will cut an ellipse shape in initial Doner layer if there is an intersection with it. You may cut everything and layer will be empty. After that, you still can add new ellipses. You can actually see the whole process of cutting shape like selecting initial feature, setting it like a target to be cut then selecting cutter and finally cut. This is because of some bulky MapBasic which cannot change shape in *.tab files directly.
Set CRS is a special button to set a unique coordinate system and bounds for current mapper window. This is due to two things. The first one is based on MapBasic limits for MapperInfo function. According to MapBasic Reference "MapperInfo( ) does not return coordinates (for example MINX, MAXX, MINY, MAXY) in the units set for the map window. Instead, the coordinate values are returned in the units of the internal coordinate system of the MapInfo Pro session or the MapBasic application that calls the function (if the coordinate system was changed within the application). Also, the MAPPER_INFO_XYUNITS attribute returns the units that are used to display the cursor location in the Status Bar (set by using Set Map Window Frontwindow() XY Units)." Because of that plugin has to set coordinate system for a mapper window. And from here the second problem appear. MapInfo has a limit of 254 unique coordinate systems during MapInfo working session. This problem was mentioned before and probably there is no solution to increase limit or overwrite existing coordinate systems. So that I decided to add this button which will set coordinate system only once. If you change layer or project properties, it will stay the same so press it if needed to adjust new ellipses for new coordinate system.
Doner settings provide manual set for width and height of ellipse in percent of current extent’s width/height. It cannot be string, zero, decimal or negative number, just a simple integer number from 1 to 100. You also can set a number more than 100 but as a result, ellipse will cross bounds of current extent. In addition, you can change a "Round" checkbox to make a round shape according only on height value. "Paint" checkbox will automatically set a symbology to Doner layer (borderless translucent orange fill).
After closing MapInfo, Doner Tab layer will be located in C:\Users\%username%\Documents\mapDoner\mapinfo_doner. When you start MapInfo again and press "Add doner", plugin will use this layer.
About
My name is Pavel and I am the author of this plugin. This plugin is free but any donations would be appreciated as well as sharing it. Any question, bug reports and suggestions you can send here:
E-mail: pasha004@yandex.ru
Facebook: https://www.facebook.com/profile.php?id=100002056762317
Telegram: @PavelPereverzev